CentOS/RHEL 7 OS GPU Installation With Yum
This is an end-to-end recipe for installing OmniSci Open Source on a CentOS/RHEL 7 machine running with NVIDIA Volta, Kepler, or Pascal series GPU cards using Yum.
Here is a short video overview of the installation process.
- The installation phases are:
| Important | The order of these instructions is significant. To avoid problems, install each component in the order presented. |
Assumptions
- These instructions assume the following:
- You are installing on a “clean” CentOS/RHEL 7 host machine with only the operating system installed.
- Your OmniSci host only runs the daemons and services required to support OmniSci.
- Your OmniSci host is connected to the Internet.
Preparation
Prepare your Centos/RHEL machine by updating your system,
installing JDK and EPEL, creating the OmniSci user (named omnisci),
installing kernel headers, and installing CUDA drivers.
Update and Reboot
Update the entire system and reboot to activate the latest kernel.
sudo yum update
sudo reboot
Install JDK
Follow these instructions to install a headless Java Development Kit and configure an environment variable with a path to the library. The headless JDK does not provide support for keyboard, mouse, or display systems. It has fewer dependencies and is best suited for a server host. For more information, see https://openjdk.java.net.
- Open a terminal on the host machine.
- Install the headless JDK using the following command:
sudo yum install java-1.8.0-openjdk-headless
EPEL
Install the Extra Packages for Enterprise Linux (EPEL) repository.
For CentOS, use Yum to install the epel-release package.
sudo yum install epel-releaseUse the following install command for RHEL.
yum install https://dl.fedoraproject.org/pub/epel/epel-release-latest-7.noarch.rpm
RHEL-based distributions require Dynamic Kernel Module Support (DKMS) to build the GPU driver kernel modules. For more information, see https://fedoraproject.org/wiki/EPEL.
Create the OmniSci User
Create a group called omnisci and a user named
omnisci, who will be the owner of the OmniSci database.
You can create the group, user, and home directory using the
useradd command with the -U and -m
switches.
sudo useradd -U -m omnisci
Install CUDA Drivers
CUDA is a parallel computing platform and application programming interface (API) model. It uses a CUDA-enabled graphics processing unit (GPU) for general purpose processing. The CUDA platform provides direct access to the GPU virtual instruction set and parallel computation elements. For more information on CUDA unrelated to installing OmniSci, see http://www.nvidia.com/object/cuda_home_new.html.
Install Kernel Headers
- Install kernel headers and development packages:
sudo yum install kernel-devel-$(uname -r) kernel-headers$(uname -r)
- Reboot your system to ensure that the kernel is up to date:
sudo reboot
| Important | If this procedure to install kernel headers does not work correctly, follow these steps instead:
|
Install the Drivers
OmniSci requires only the CUDA drivers and not the entire CUDA package. To install the drivers:
- Go to https://developer.nvidia.com/cuda-downloads.
- Select the target platform by selecting the operating system (Linux), architecture (based on your environment), distribution (CentOS or RHEL), version (7), and installer type (OmniSci recommends rpm (network)).
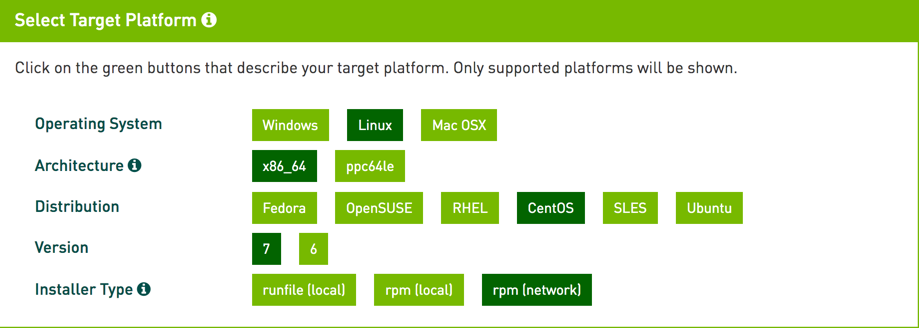
- In Download Installer..., right-click the Download button and copy the link location of the Base Installer. Do not use the installation instructions on the CUDA site:

- Use one of the following methods to download the installer from the command line, using the download link you copied (https://developer.download.nvidia.com/compute/cuda/repos/rhel7/x86_64/cuda-repo-rhel7-10.0.130-1.x86_64.rpm, in this example):
curl:curl -O https://developer.download.nvidia.com/compute/cuda/repos/rhel7/x86_64/cuda-repo-rhel7-10.0.130-1.x86_64.rpm
wget:wget https://developer.download.nvidia.com/compute/cuda/repos/rhel7/x86_64/cuda-repo-rhel7-10.0.130-1.x86_64.rpm
- Install the CUDA drivers using the filename you just downloaded (
cuda-repo-rhel7-10.0.130-1.x86_64.rpmin the previous step):sudo rpm --install <file_name> sudo yum clean expire-cache sudo yum install cuda-drivers
- Reboot your system to ensure that all changes are active.
sudo reboot
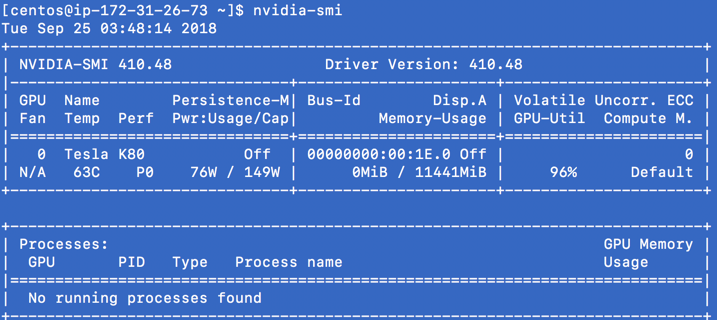
| Note | You might see a warning similar to the following:warning: cuda-repo-rhel7-10.0.130-1.x86_64.rpm: Header V3 RSA/SHA512 Signature, key ID 7fa2af80: NOKEYIgnore it for now; you can verify CUDA driver installation at the Checkpoint. |